Sunday, December 5, 2010

Final Project! Super Time Lapse!

All right! Final project time! Rather than leaving my audience with cliff-hanger after cliff-hanger every blog post...I've decided to condense everything into a super time lapse for you! ....right. Anyway, I've been working on this final project for the better part of the semester, as I am doing the VFX for Karinne Berstis' short film, "Kinks" in our 343 class. So it's been an ongoing project, as you can see from one of my first blog entries when I performed a motion test.

Pre Production:
Too much side space?
The  pre-production took place actually even before I got any footage. I was also the Director of Photography on this film and so I had to plan each shot carefully to allow room for where the bubbles would take place. This meant sometimes cutting off peoples' faces (something you obviously never want to do in a regular film) to make room for the bubbles, or leaving tons of head-room or side space.

Not so weird when bubble's are in!
The pre-production work for the actual compositing went a little like this:
- gather animations for bubbles (or clip-art for the rough tests)
- organize each shot into a composition

- listen to pump up music!


Progress:
The main workflow I used for the compositing of the project was as follows:
Motion Tracking:
First I'd add a null object to the comp. and then find something on the actor to track to - usually I did something on the face (so the motion of the bubble bouncing around would match when the actor turned their head). I chose not to have the bubble 100% attached to the actor - as in when the character turns their head, the orientation of the bubble does not necessarily move. Both the director and I felt it was more important to have the bubble readable than to follow every nuance the head made - as we found out in some earlier tests I did. 

Bubble Composition:
Next I'd make the bubble itself. I used the same template for most of the bubble outlines and just squeezed and stretched as needed. Within each shot I had a new composition for every bubble that was made - and I did this for 2 reasons.
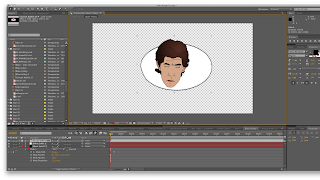
1. When you turn the layer into 3d everything inside the bubble is on the same plane since it's just a nexted composition. That way I wouldn't have to worry about one part of the bubble (the outline, the shadow or the animations itself) popping out in Z-depth just because I didn't line it up properly.
2. If each bubble was its own composition, it would be much easier to later go and swap out or replace animations. I knew I'd be doing a rough cut version (2 at least) as well as the final, and I wanted to make sure I had things organized so say, 4 weeks in the future, I could just as easily navigate through and replace the animations with newer ones, or tweak the way something looked.


Once the bubble was made I'd drag it into the shot composition, turn it into a 3D layer, adjust the orientation based on the character's head position, re-adjust scale and position so they never went over the actors face, and link it to the null.


Next step would be to add the lights to help it integrate into the world better. I generally used point lights, which allowed a small "vignette" with the shadows coming across it. During this stage I'd also adjust for reflections. I had considered doing shadows for the bubbles, but in the end it wouldve required too much masking and it wouldn't be that noticable anyways.
Can you spot the differences?

It's all about the details! Check the wall.
Lots of masks for 1 simple move.
That leads me to: MASKING! Unfortunately there are a number of shots where a character walks in front of the camera, or a hand comes up or we pass behind an object. All of these instances require a ton of masking work...which isn't fun at all. Keeping up with good habits, I break up the objects I'm going to mask into a lot of smaller layers to give me greater accuracy and flexibility in keeping things clean. Being a roto-artist is definitely not something I'd like to do but I suppose if I do get a job at a VFX house somewhere everyone has to go through the ropes...ugh.

The final steps for me are Color Correction and rendering. For some reason that I don't know (maybe Ben can give me some insight?) when AE renders a file out, the colors become a lot darker. Even with the same codec (ProRes422) and all the settings, the image comes out a bit darker. So I just make 1 adjustment layer with the color correction I need and apply it to all the shots within a scene - regardless of having VFX or not. Otherwise it would take a super long time to match the shots with no VFX to the slightly darker shots that do. After that it's off to the render queue and me off to bed! ...HA.

Anyways, that's the process I went through for VFX on "Kinks". Come to CMB on Dec. 12 at 12PM to see it screened!

As for what I'm turning in, 1) the sound people need to go through the final mix and all, 2) Not sure I can screen the director's movie in another class! But here's more or less what it'll look like.

Kinks Excerpt from kabraz on Vimeo.

Friday, November 12, 2010

3d Match Moving Assignment

Awright! Finally down to the match moving/CG integration! So during the summer my friend Scott and I filmed a really quick 1 minute short about me running like a lunatic with a Nerf gun trying to get to the last helicopter leaving to safety whilst the neighborhood around me was under siege by giant alien space-ships...and...Drones! I drew up a concept piece for Scott who then modeled it in Maya and sent it over.

Tracked it in Maya's Match Moving software (first time for me using that software and it went surprisingly painlessly!) and brought it straight into Maya where I tried to keep things to their bare essentials. I really still suck at lighting and texturing so I tried to hide it with the fact that obviously there would be a ton of crap going on to hopefully distract you, but I dropped in the model, textured it with this red, rusty texture I found (the drone was initially going to be very shiny...but then I realized how much harder that would be if it had to reflect everything around it...) and then threw in some lights. The first shot has only one ambient light sorta behind it, while the 2nd shot actually has some directional light hitting it from the backend to kinda give it a light wrap from the "sun". It took quite a lot of messing around and I'm still not convinced I did anything correctly, but I managed to use a still-frame of the shot as the Color File for the lights and just messed with Eye-dropping different samples of the footage to sort of match the colors.

Then exported and brought into AE where I did the compositing and Color Correction. For next time I really need to just export the model by itself so I can properly layer it on top of the elements...for example in the first shot I wanted the car-bomb explosion to be behind the drone but since it was all 1 piece (and I didn't feel like doing some roto) I had to slide it over to the left to avoid having the flames "on top" of the drone as it turned around.

Secondly, after a few test renders I realized in the initial renders of the 2nd shot I had too much movement going on for a mere 31 frame animation. I simplified it and tried working with the curves editor (but my damn mouse middle click sucks so I couldn't adjust anything...) and ended up trying to do pseudo curves with the keyframes to mimic the "distance" it had to travel - i.e. making it come from the background more slowly and appear faster as it flew towards camera.

The one thing I wish I could do (and I'll probably ask you Ben) was to move the locaters from Matchmove into After Effects. I'd already got a pretty solid track from Matchmove and it'd be nice if I didn't have to track again, in AE or a 3rd party program, for the other VFX components.

 Final Composite!
Light wrap around the back, but pretty unimpressive texturing and lighting...=/
Dunno what all that artifacting is but as you can see it's nothing amazing...just all hidden!


Drone Shot VFX from kabraz on Vimeo.

Saturday, November 6, 2010

Ball Drop

I thought this video was up but apparently not...there was some formatting issues while uploading to Vimeo. Anyways, simple physics test with a ball dropping and colliding with little blocks!

Ball Drop from kabraz on Vimeo.

Thursday, November 4, 2010

Surveyor Ben!

So I had created this cityscape for a test and decided to test if I could do a believable camera move around a live action clip. Obviously it didn't turn out perfectly well but with a little tweaking I think it could be a bit more believable.

Surveyor Ben from kabraz on Vimeo.

Thursday, October 21, 2010

3D layers in AE

At the risk of sounding totally douche-y this is the logo I created for the production company consisting of myself, Harrison Reynolds, and Shane Gibson. It was a pretty basic task of getting the sides to unfold onto each other (although I had to watch for seams since the slightest bit could stick out) and the hardest part was lining the pivot points up with the edges of the squares. I had it a bit easy since the sides didn't contain any depth, too. I then just animated a camera flying around (also to hide the fact that there are more swinging panels than there are sides - to make it more complex looking I folded a few sides over twice and just deleted the layer once it was in position - and then added Trapcode Shine to it for that super blue look. Overall I think it worked out quite well! Added some sounds and here's the production logo...although after the fact I noticed it did look a bit like the game cube logo - but if you won't tell I won't either.

A Box of Thirty Logo from kabraz on Vimeo.

3D Texturing


So while modifications of R2 continue I decided to just go ahead and try to texture in a very basic way some of the shapes on R2's dome (since the main body doesn't really have any detail yet. I added blinns to both the dome and the body to give it that shiny look and messed with the specular a bit on the dome to bring it up. Then I just made 1 blue blinn and used the same one for the rectangles around his dome, then made a red one for the circular "eyes". Nothing amazing, and quite honestly I thought it looked cooler when it was just the model. But oh well...til it gets more details I'm going with that.

Friday, October 15, 2010

Text and Particles

So had some computer troubles which caused this post to come up late but here it is! I tried my hand at a little kinetic typography and ultimately decided it's not something you can do quickly...obviously. I think the biggest problem for me wasn't that it would take a long time - I was expecting that - but that the camera was extremely finicky. I started by creating a simple vignette around a blue solid (both 2d layers) and then made the letters themselves 3d since my original idea involved a lot more 3d camera movements, as opposed to say a lot of 2d used in Cee Lo Green's "F*ck You!" unofficial music video. Anyways, the challenge came in keeping the Point of Interest of the camera locked onto the text as it came up, and since the camera was moving all the time to accommodate the text. Basically when I went down too far the POI wouldn't change and while the camera was still at a "90*" angle to the 3d Text the offset of teh POI made it deform. So...yeah. I ended up making 2 sequences and in the 2nd I kept the camera still but animated the text so the POI and Position never changed.

Mitch in the s'th from kabraz on Vimeo.


The 2nd was the particle shot. I've dabbled with Trapcode Particular, 3D stroke, Form, etc, but never really got the hang of it. I did use Shine a lot but that's a pretty simple one...but after seeing tests of Particular 2.0 and watching a lot of videos I was determined to learn a bit more about it. Based off the Lexus Orb tutorials (crazyyyy commercial...way cool) I used particular to make a constant stream of particles. Unlike the tutorial, I managed to create what I think was a really cool texture of semi-transparent...material that made up the "tails" of the particle streams. I made the "heads" lights and attached Trapcode Lux to amplify them, then parented both to a null which I then used to control both streams. The subtle movements they make individually were achieved by messing with their individual orientations. Anyways, I had fun, learned a lot, and am excited to do more with custom particles.


Particular 2.0 Test from kabraz on Vimeo.

Thursday, October 14, 2010

3D model

So still not exactly how I'd like it, but here is my first 3d model! I did R2D2 because I thought it might be easier to work with something mechanical that had no organic parts. Also, I figured if we'd be potentially using the same models for a few projects it would give me time to tweak all the little details. Unfortunately, sometime early in the modeling process the dome I extruded something weird resulting in the top of the dome being kinda deformed, but I decided just to keep it that way.


 I used some schematics and blue prints from the Artoo Detoo builders club website and also based off this guy's amazing model. I also had an R2 USB hub model that I used for some of the details to base it off of.


Not expecting mine to look anything like his but it's good reference...anyways I guess finishing the details at a later date, texturing, and rigging are up next....

Thursday, September 30, 2010

Motion Track Test

So this is a tracking test for a short film I'll be shooting in October. The premise revolves around characters communicating through thought bubbles. So this was a short test with a 2d motion track and then another test with a matchmove revolving around a character. The 2D track was done in AE with 2 track points on the light panel and on teh bookcase, and the 3D track done in Boujou and then imported back into AE for the composite. I added a light to the 1st one which I really liked, but the 2nd one was a bit harder since the scene makes itself a 3D camera.

Kinks Motion Test from kabraz on Vimeo.

Thursday, September 23, 2010

Visual Effects Assignment 3

So I somehow manage to always do next week's lesson this week...ugh. I had some of those advanced animation and what not with the Star Destroyers but here's what I did this time. I did a 2d motion track with After Effects' built in tracker (which surprisingly held up!). Applied the data to a null and then started with the composites. Just like the Star Destroyers I cut out some helicopters and made them into two 3d layers for the hull and rotors. Precompsed those and dropped them into my main comp with some motion blur. There was 1 on the ground, 1 beginning to take off, and 1 in transition from takeoff to flying. The last chopper I keyframed to ease so the velocity of the chopper would speed up as it leaned forward to push itself through the air, while the take-off chopper had to first build some resistance and then ease into motion. I composited the different layers of smoke and then a general layer of atmospheric smoke - including the smoke that reacts to the choppers (which was just a lucky coincidence from Action Essentials 2 - thanks Andrew Kramer!) and finally composited in the Mon Calamari star cruiser (although masking the leaves out was a huge pain.

VFX Shot from kabraz on Vimeo.

3d Renders

Right so this next assignment was a lot of messing around - trying one thing and then kinda getting something else. Which isn't entirely bad...I'm pretty happy with the way some of them turned out. But...I'd like to get to the point where I'm doing these things on purpose rather than tweaking some settings and having stuff kinda come out.

For the logo I did Panda Cheese based off the hilarious Egyptian commercials for the product. With the bezier tool I traced over the entire thing and it came out....lumpier than I'd like. I then changed the curves to planes and colored them.
Next I did the revolve - and this actually came out sort of how I wanted. I drew from the Right side view half a profile of a lightsaber handle (I've been playing way too much Force Unleashed...haha) and then revolved that around. Unfortunately, still not too comfortable with working in NURBS I just created a 2nd cylinder and stuck it through the handle "wall" for the button.
Also, while saving these frames as png's I guess I didn't have a background so it rendered as white? For the extrude I had the concept of a wall in mind so I designed the curve of one here

 and then drew a curve to create the wall. But messing with some of the rotation functions I thought it looked like it could serve as more of a roller coaster...so I just went with that.


And lastly I messed with the lofting for a bit and then by accident created something kinda cool (which I didn't render out...probably should have but didn't think it'd get anywhere.) Basically it looked like part of a cape wrapping around somebody. So going off of that and a love for the characters like Batman and Spawn who always have these crazy capes enveloping their bodies, I drew curve layers to loft. The bottom layer was fanned out like the bottom of the cape along the ground while the 2nd was the "shoulders". I had no idea the "cape" would wrap the way it did but I was pretty happy with that. Just for reference I added a head and gave him some Batman ears. Baha.

Elevated view from the back - cape kinda swirling? Maybe?
More of a side view
A straight on view didn't look really right the way some of the layers overlapped so I just tried to hide it...anyways, with some things coming out planned and others that kinda made their own way, here it is!

Thursday, September 16, 2010

City Invasion

So finished up animating my scene. At first I had the whole sequence as a still shot with a little camera wiggle, but later I decided add in a more handheld camera feel, full with the rack focuses and stuff.

Little breakdown of what's going on here: I had the cutouts of all the ships but this time I cut out the tall building foreground to put the 2nd ISD behind (I even named them!) I then did some simple animations to get a feel for the movement of all the ships (I really wanted to emphasize the hugeness of the ships so I had them move really slow). It was also really important that I get the engine heat distortion set up so I worked on that first - I added a particle system (2 on top of each other) and then used them to act as a displacement map for the Destroyer. Since only the leftside engine would be visible I only did the engine distortion on that side - I had tried to do make some engine glow but that ended up not working well since I couldn't play the light off the hull. I then parented the particle system to the engines and made them 3d layers so I could push it back.

The next big item was the helicopters. I took the cutout (it was the whole chopper) and split it into 2 layers - one of the body and one of the rotor blades. I made the blades 3d layers and keyframed them to rotate around, then precomposed them and duplicated. I did the same for the 2nd helicopter body - I had them separated as the Military chopper (screen left) and the 4 "news" choppers.

I added in the TIE fighters squadron too and had them drop down from the shadow of the ISD "hull".

Finally the last touches were precomposing the entire scene and putting it into a slightly smaller composition - to give room for the camera wiggle and handheld stuff. I made the composition wiggle on it's own, but after adding a 3d Camera I also put a wiggle expression on the z-orientation. Finally checked all the motion blur on and animated the camera - unfortunately I didn't have a realistic lens focus effect so I just added a gaussian blur and manually keyframed it once the camera moved. After several test renders and tweakings here's the final product!


City Invasion from kabraz on Vimeo.

Tuesday, September 14, 2010

Perspective Digital painting

So for the Perspective Digital Paint I thought it'd be fun to kind of mess with the color palate a bit. Going for a bit of a cartoony look I have everything shaded in weird colors, but I tried to keep the fundamentals of design and color in mind. For example, I still tried to make darker colors represent closer objects and lighter ones in the distance, including the sides of the house for shading.

The house and overall silhouette were on one layer that had a transfer setting of multiply attached to it so I could paint within the outline. For big expanses, like the foreground and sky, I added to their own layers and just wiped across the entire area. Also, in those big expanses I changed the brush type to a feathered brush with opacity so I could (attempt) to do some fall-off with distance. That was about it!

Thursday, September 9, 2010

Star Destroyer City

Not amazingly creative, but I do love me some Star Destroyers. Kinda going for a District 9 feel with the helicopters too, but I think they give the scene a little more life. I had considered TIE fighters as well but in the end held against it. Anyways, here it is! 2 Different Star Destroyer layers + 2 helicopter layers (I think it's obvious which one is duplicated). I bumped the contrast on everything up to create the silhouettes and added a little grain to the nearest Destroyer too.

Monday, September 6, 2010

3D Renders

Created a simple scene mapping textures to spheres. You can't really tell but I mapped a galaxy photo to a large sphere, and inside created the Earth, Moon, and the asteroids. The asteroids are simply spheres that are slightly deformed - I just duplicated it a second time and rotated it for the 2nd asteroid. Then I just went online and downloaded a TIE fighter model and stuck a few of them in there. I wanted a Star Destroyer but the file I downloaded was a .obj? and when I dragged it onto the grid this HUGE thing showed up and each section of the ship was split into different pieces- like the bridge, the engines, etc. and I didn't know how to group them or scale them all down uniformly so I just scrapped that. Anyways, hopefully we'll get into what all that was about.


Wide View

CU of TIE model & Asteroid Texture


POV TIE View

Tuesday, August 31, 2010

Introduction

Greetings fans! Or just Ben...this will be my first ever blog/journal I've kept. And yes, I am getting a bit of a late go on this but I'm going to blame it on the fact that my Macbook just died on me and am currently awaiting arrival of a new one that I bought. And the hole it left in my pocket is one I'm going to be feeling for quite a while...

Anyways, if you couldn't tell from the top of the page my name is Jamie. Born and raised in New Jersey, moved to Korea for 3 years, then to Houston, and now to Austin. Guess I started teaching myself After Effects in...sophomore(?) year of high school - when I first started making movies. The one effect in that first film was tracers for bullets...and needless to say those didn't turn out quite that well. But after years of scouring CreativeCow and VideoCopilot tutorials, I like to think I've got a pretty decent understanding of the main workflows in After Effects. I really don't know all that much about expressions and I guess I'm just looking to actually get a real course in After Effects. I'm always down to learn more and improve technique and workflow so I'm really looking forward to this class. Actually, I should clarify and say both classes - the 3d and the VFX & Motion Graphics.

Really looking forward to modeling in Maya and incorporating that into my films, or at least get a grasp on what the process is. I've got the basics of the automated trackers in Boujou but beyond that - actually getting the models into Maya and then the whole multi-pass compositing in AE is all new to me. I've had very very elementary exposure to Nuke compositing (all those nodes are so weird to look at after working in AE...) and a little C4D/Maya. And when I say "elementary" I really mean I did a few tuts in each and have pretty much forgotten everything now...all the shortcuts and menus and whatnot.

Anyways, guess I'll close with saying my dream job is to become a director out in LA and work for a studio. Getting there, I realize, is going to be a hard, hard road, and in order to sustain myself til I get my shot I feel it's necessary to have a good backup. Which is where I think having a hand in VFX, compositing, or motion graphics will come in handy. I've taken many opportunities in helping people out for creating titles or adding VFX into most of my shorts. Included now are a couple of things I've put together...although I don't have a strictly VFX & Compositing reel yet...should probably get one of those up in the next few weeks.

Making of Private Eye: Some steam composites (really smoke...steam doesn't move that way) but pretty proud of the text removal on the Ace of Spades.

The Making of Private Eye from kabraz on Vimeo.

This was the opening and Title graphics for a summer camp I worked for. Since I was there for all 4 terms I just swapped out the footage of the kids doing activities to match the current term. Was pretty pleased with being able to apply concepts from Andrew Kramer's Earth Tutorial and use the CC Sphere to make the baseball (you can see where the seams don't line up a little as it spins by). Camera moves and Shatter were pretty standard too, and I'm sure if I knew an expression I could've donjavascript:void(0)e something with the lights but I ended up just keyframing them...the actual "Camp Olympia" titles used the Trapcode Shine plugin with some rectangle card transition or something that was built into AE. Plus the lens flare...cheesy but I always like using it to give stuff a little zing.


I have no idea if these vids are going to show up...guess I'll find out soon enough. Oh, I should add I have both a Youtube and Vimeo account...in the process of sticking only to Vimeo but actually getting an account under my real name to be all professional and all...(wow I think this is going to be a really long post). So on that note I'll end it here...have a few other clips but maybe I'll post them next time.